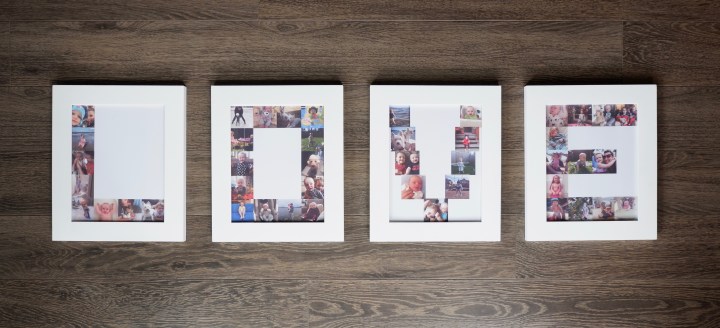
As parents we are constantly trying to capture our children’s most beautiful moments. Unfortunately, we don’t have a lot of a family in the area so I tend to share our kid’s milestones and most beautiful moments on Instagram. I had an empty wall in the kids play room that I was hoping to add a DIY project to and what better way then to showcase these special pictures! So I scoured Pinterest for ideas, I wanted it to be big enough that I could use quite a few photos, but then I had to decide if I wanted one big frame or multiples. I decided to give spelling the word ‘LOVE’ a go and see where it took me.
Now to find a program to create this DIY.. I’m no computer wiz, but I wanted to use a program that was free or even better that I already had so I gave Microsoft Word Processor a shot. I will admit this DIY does take some time, but I found as my husband and would I catch up on our latest flick in the evenings I could mindlessly work on this project.
Step 1: Sort through your Instagram photos and pick your favourites and save them in a easily accessible folder on your computer.
Step 2: Open up a new blank document on Microsoft Word Processor.
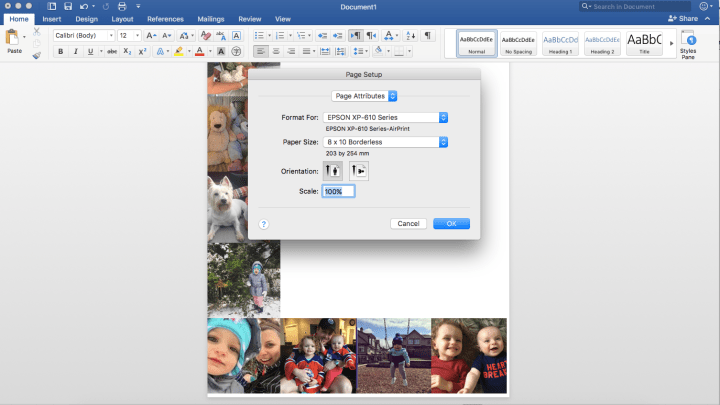
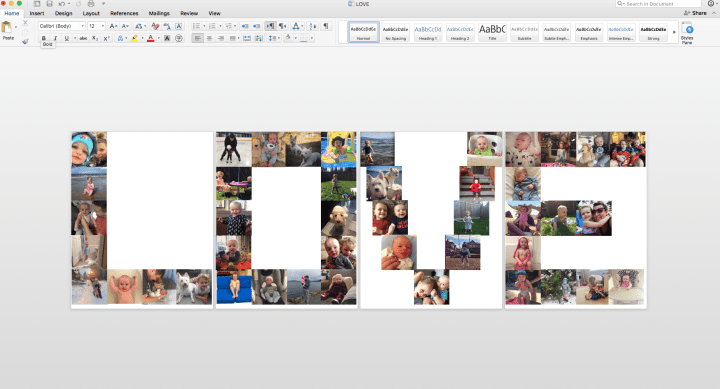
Step 3: Adjust your ‘Page Setup’ to the appropriate size frame(s) you would like to use. I chose to go with four 8 x 10 frames.
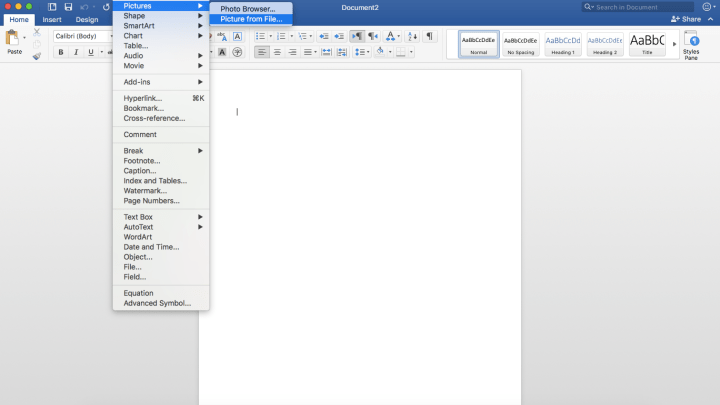
Step 4: Insert the photos you have chosen into your new word document by selecting ‘Insert’ then ‘Pictures’ and finally ‘Picture from File’.
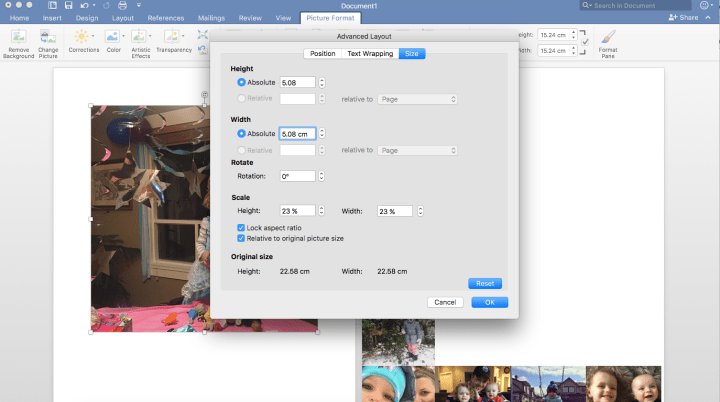
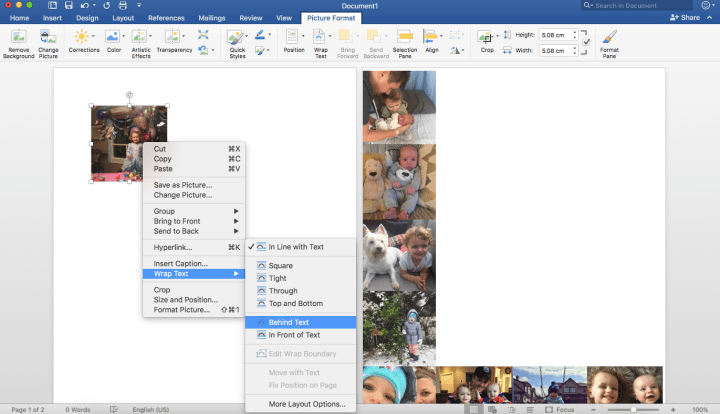
Step 5: This was the most time consuming portion of the DIY and that was going to ‘Picture Format’ and re-sizing every photo to fit on the page. I found going with a 2 in. x 2 in. (5.08cm x 5.08 cm) photo worked best.
Step 6: To allow you to move each photo freely, you will need to adjust the ‘Wrap Text’. Selecting ‘Behind Text’ seemed to do the trick.
Step 7: Now the fun part! Move your photos around the document to spell a word or form your design of choice.
Step 8: Once you are happy with your layout you can either print out your DIY project on your home printer. I would recommend printing on photo paper or take it to your local Staples and they would gladly help you out!
Notes: I found I needed to trim each page slightly to fit in my frames, so be sure to leave a little room around the outside perimeter.
Let me know in the comments if you’ve given this DIY or something similar a try! I would love to see what you come up with 🙂
Andreana xo
